Self-Host Jellyfin on a Mini PC

🎬 Overview
Jellyfin is a free, open-source media server that lets you organize, stream, and share your personal media library across devices without relying on third-party cloud services.
It’s a great option for
- 🛡️ Privacy-conscious users
- 🏠 Home media enthusiasts
- 💸 Anyone looking to reduce streaming service costs

🧰 What You’ll Need
To run Jellyfin reliably and efficiently, you’ll want a small, quiet, energy-efficient machine like a mini PC.
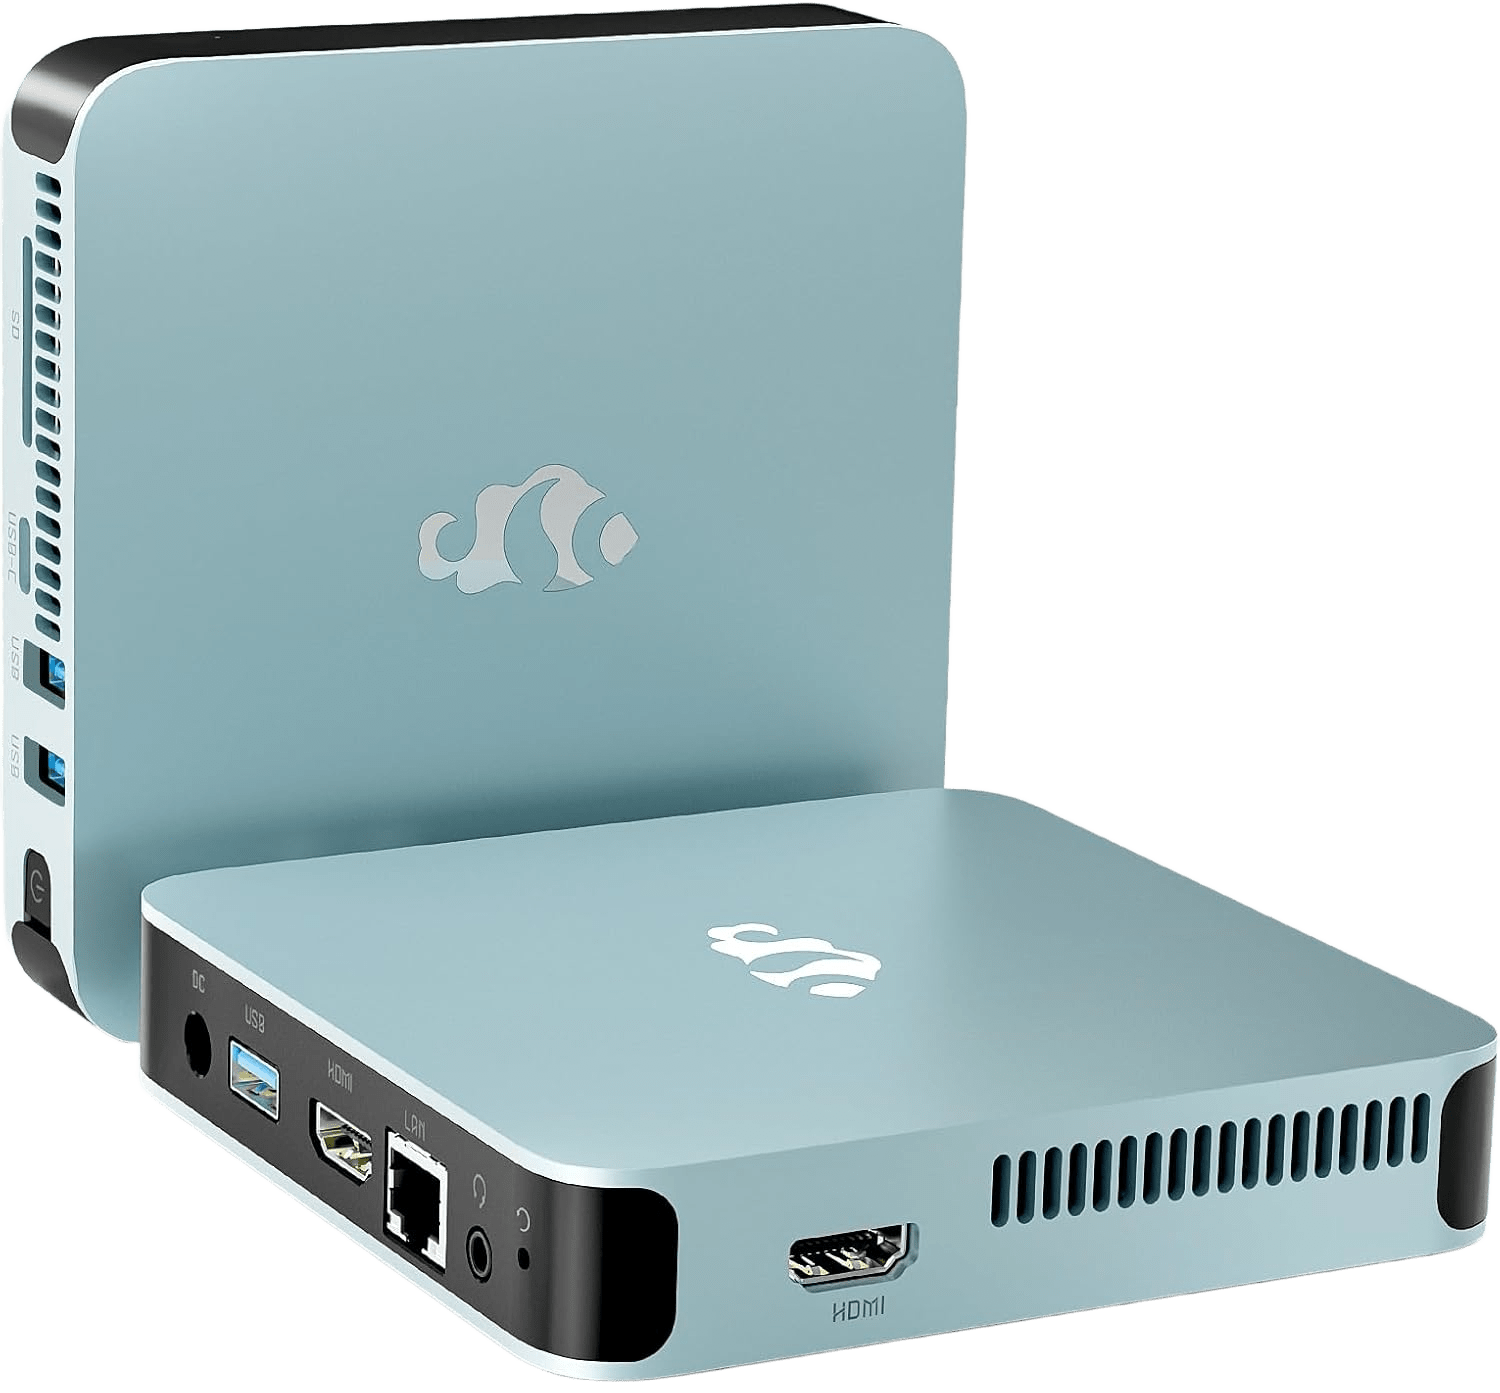
🖥️ Nimo N100 Mini PC Specs
| Component | Specification |
|---|---|
| Processor | Intel 12th Gen N100 (4 cores, up to 3.4GHz) |
| RAM | 16GB DDR4 |
| Storage | 512GB M.2 PCIe SSD |
| Graphics | Intel UHD Graphics (supports triple 4K@60Hz displays) |
| Connectivity | Wi-Fi 6, Bluetooth 5.2, Gigabit Ethernet |
| Ports | 2× HDMI, 1× USB-C, 4× USB 3.0, 3.5mm audio jack, SD slot |
| Operating System | Windows 11 Pro |
| Power Use | ~12W average |
| Form Factor | Compact with VESA mount support |
This device offers plenty of performance for a media server and draws minimal power, making it perfect for 24/7 operation.
💰 Cost
I canceled two streaming subscriptions, one at $14/month and another at $16/month, for a total savings of $30 per month. The mini PC cost me $140 upfront, and based on an estimated 12W average power draw, it costs roughly $1.50 per month to run. That means I’ll break even in about five months. After that, it’s all savings.
Monthly Savings and Cost:
| Item | Monthly Cost | Notes |
|---|---|---|
| Canceled Streaming Services | -$30.00 | $14 + $16 per month saved |
| Electricity for Mini PC (12W) | $1.50 | Estimated based on 12W continuous usage |
| Net Monthly Savings | $28.50 | After accounting for electricity costs |
One-Time Hardware Cost:
| Item | Cost |
|---|---|
| Nimo N100 Mini PC | $140.00 |
📖 Guide
🐧 Install Ubuntu Server
The mini PC comes with Windows 11, but since we’re only using it to host Jellyfin, we don’t want the OS to take up too much storage. Ubuntu Server (minimized) only takes up about 4GB compared to 64GB for Windows 11!
1. Prepare for Install
Create a bootable USB stick with Rufus on Windows
Linked in this guide are similar tutorials for macOS and Ubuntu.
2. BIOS Setup
- Attach a monitor, Ethernet cable, and keyboard to your mini PC.
- Plug in the USB drive containing the Ubuntu Server installer.
- Power on the device and repeatedly press
F2(or your PC’s designated BIOS key) to access the BIOS setup. - Set the USB drive as the first boot device.
- Save changes and exit the BIOS. The system should reboot and begin loading the Ubuntu installer from the USB drive.
3. Ubuntu Server Install Steps
Language Selection: Choose your preferred language.
Choose type of install: Select Ubuntu Server (minimized).
Network Connection: Confirm that Ethernet is connected. You should see an IP address assigned.
Proxy Configuration: Leave the proxy settings as default and select Done.
Ubuntu Archive Mirror: Leave this as default and select Done.
- Storage Configuration:
(Recommended) Default LVM Setup
This will create a Logical Volume Manager (LVM) group and typically allocate only ~100GB of space for Ubuntu, even if your disk is larger.
📝 We will expand this volume after installation using LVM commands.(Advanced) Use Full Disk Now
- Choose Custom Storage Layout
- Uncheck the option “Set up this disk as an LVM group”
- Manually create a single partition that uses the full disk (e.g., a root
/partition and optionally/bootand/efi) - Continue with the install. This setup gives you full control from the start without needing to expand volumes later.
Storage Review: Review the configuration and select Continue.
- Profile Setup
Enter:- A name (e.g.
jelly) - A hostname (e.g.
jellyfinsvr) - A username and password (you’ll need these later)
- A name (e.g.
SSH Setup: Check the box for Install OpenSSH server to enable remote access.
Featured Server Snaps: Select any other services you may want otherwise skip this.
Finish Installation: Once the installation is done, select “Reboot Now” and remove the USB drive.
If you leave the USB plugged in, the device will try to start the installer again because we set it to boot from USB first.Login: Log in using the username and password you just created.
- Let’s make sure the our packages are up-to-date
1
2
   sudo apt update # Check what updates are available
   sudo apt upgrade # Install the updates
📝 Expand LVM to Use Full Disk
Let’s check how much space is allocated to the partition where we’ll be storing our media on the Ubuntu Server.
Check available disk partitions with using the
lsblkcommand1 2 3 4 5 6 7 8 9 10
# Example output NAME MAJ:MIN RM SIZE RO TYPE MOUNTPOINTS loop0 7:0 0 73.9M 1 loop /snap/core22/1908 loop1 7:1 0 144.5M 1 loop /snap/docker/3064 loop2 7:2 0 44.4M 1 loop /snap/snapd/23771 nvme0n1 259:0 0 476.9G 0 disk ├─nvme0n1p1 259:1 0 1G 0 part /boot/efi ├─nvme0n1p2 259:2 0 2G 0 part /boot └─nvme0n1p3 259:3 0 473.9G 0 part └─ubuntu--vg-ubuntu--lv 252:0 0 100G 0 lvm /- In this case
- 100GB is allocated to Ubuntu
- 373.9GB* is unallocated within the LVM
- Another was to see this is is with
sudo vgdisplay- Look for a line like
Free PE / Size 95328 / 372.0 GiB
- Look for a line like
- In this case
Now we want to extend the logical volume
1
 sudo lvextend -l +100%FREE /dev/ubuntu-vg/ubuntu-lv
Resize the filesystem
1
 sudo resize2fs /dev/ubuntu-vg/ubuntu-lv
Confirm new disk size with
df -h
You should now see the full disk capacity available under your root (/) partition.
🪼 Jellyfin
1. Install Jellyfin on Ubuntu Server
1
2
# One‑liner install script
curl -s https://repo.jellyfin.org/install-debuntu.sh | sudo bash
Press Enter when prompted.
When the script finishes you should see something like:
1
You can access your new instance now at http://192.168.0.xx:8096 in your web browser to finish setting up Jellyfin
2. Create media folders
Now let’s create a folder to put our media in
1
2
3
4
5
6
# Master media directory
sudo mkdir -p /Media

# Inside it, add the two standard libraries
sudo mkdir -p /Media/Movies
sudo mkdir -p /Media/Shows
➡️ Need different names or extra folders? Check Jellyfin’s media‑naming guide
3. Configure shared access
Replace <username> with your own, e.g. john.
Create a shared group that both you and the Jellyfin service account will join
1
 sudo groupadd mediaaccess
Add users to that group
1
2
 sudo usermod -aG mediaaccess <username>
 sudo usermod -aG mediaaccess jellyfin
Make the group own the media directory
1
 sudo chown -R <username>:mediaaccess /Media
Set permissions: readable, writeable, and executable
1
2
3
 sudo chmod -R 775 /Media
 # Ensure new files inherit the same group
 sudo chmod g+s /Media
- 775 Permission mode:
- 7 (owner) → read, write, execute
- 7 (group) → read, write, execute
- 5 (others) → read, execute (no write)
- 775 Permission mode:
Verify: All three lines should reference mediaaccess
1
2
3
 ls -ld /Media
 groups <username>
 groups jellyfin
4. Enable Jellyfin to start on boot
1
sudo systemctl enable jellyfin
- Check to make sure this worked and Jellyfin is set to startup on boot
1
systemctl is-enabled jellyfin
5. Finish setup in the web UI
- Open a browser to
http://<server‑IP>:8096(example http://192.168.0.xx:8096). Follow the on‑screen wizard. When it asks for Libraries, add:
Library name Folder path Movies /Media/Movies Shows /Media/Shows - Complete the remaining prompts and click Finish.
🚛 Move Mini PC to it’s Resting Place
Shut down the mini PC
1
sudo shutdown now
I did all this setup at my desk next to my main PC. Now we can unplug the keyboard, monitor and ethernet cable from the mini pc and move it to it’s final location.
I placed my server next to my router and turned it on. We previously configured jellyfin to start on boot so we should be good to go.
🎞️ Adding Media
Now that Jellyfin is up and running with access to our media folders, the next step is to add media files.
1. Test Connection
Before transferring anything, it’s a good idea to test remote access by SSH-ing into your server from your main computer. This ensures you can manage the server without needing a direct monitor or keyboard connection.
1
ssh <username>@<ip_address>
You can also check if Jellyfin is running
1
systemctl status jellyfin
2. File transfer with WinSCP
- Download WinSCP
- Install and launch the application.
- Gather Ubuntu server connection info
- IP address of the Ubuntu server
- Username
- Password
- Configure a New Site in WinSCP
- Open WinSCP
- Click New Site
- Set the following
- File protocol: SFTP
- Host name: Your server’s IP address
- Port number: 22
- User name: Your Ubuntu username
- Password
- Login
- Click Save to reuse the config later (optional)
- Click Login
- If you connect successfully, the window splits:
- Left = Your PC
- Right = Your Ubuntu server
Now just drag and drop files between your PC and Ubuntu Server!
📦 Closing Thoughts
Setting up a Jellyfin server on a mini PC is a rewarding project that can save you money and give you more control over your media.
If you want to access your Jellyfin server remotely, you might consider using Tailscale, a simple and secure mesh VPN that can help you access your home network devices from anywhere.
👉 Note: I haven’t set this up myself yet, but it’s a popular option in the Jellyfin community.
Also, there’s a Jellyfin app available for many platforms
- 📱 Android
- 🍎 iOS
- 📺 webOS (Smart TVs)
If this guide helped you and you’d like to support more content like this ☕ Buy me a coffee
👋 Happy streaming!